Description | Request an Account | Instructions for Use | Acceptable Use Policy | Fair Use/Copyright
To create your podcast channel you can use our Web interface. Simply open your Web browser and go to: http://3crss.org/controlpanel
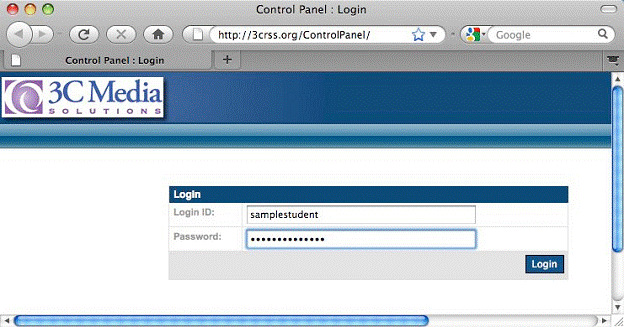
Enter your username and password.
Create your Channel
At the very bottom of the left column, click Podcast under Global tools. This is where you go to create your podcast channel and add in your episode(s).
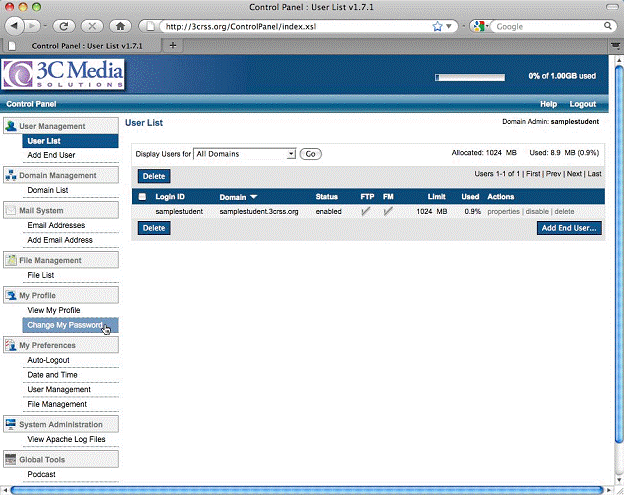
Click Create New Channel in the center of the window (either one of the two is fine).
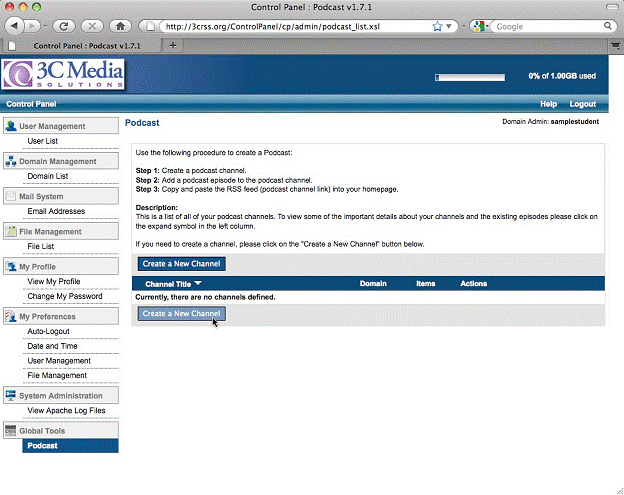
Now enter your information into the form fields.
-
Title of Podcast Channel is the Title that will show up as the podcast channel name for your subscribers. You can call it anything you want but you might consider including your course name/number/college/your name etc.
-
Podcast Channel Domain is set at yourname.3crss.org. DO NOT CHANGE.
-
Channel Directory is the name of the folder you will use for storing files. No spaces are allowed in this name.
-
Channel File Name is the name of the file you want to create for your .rss (XML) file. No spaces or non-standard characters allowed; a .rss extension will be added.
-
Website URL: is to any Web site that you want subscribers to be able to click to get to from your podcast. You might use a faculty page, a blog, or your home page, for example.
- Description is the “verbose” description that appears with your podcast channel. It should be “big” enough that it encompasses the scope of your entire podcast channel, not just the content of this first episode.
The rest of the information is optional, but recommended.
-
Language: choose from the drop-down list.
-
Copyright: a good idea “Copyright You 2009” or even “Copyright Your College 2009”
-
The Publication date: You can either fill out this info with the current date and time, or leave it blank.
-
Image: You can include a link to an image for your podcast here (you’ll have to upload the image file). The path is: http://3CRSS.org/username/folder/file.jpg.
-
Title: Use the Channel name
- Link: Leave this blank.
![]()
Click Show iTunes Information. Here you can enter supplemental information that will display if your students use iTunes to subscribe to your podcast.
-
Subtitle: This is a short description of your channel – it shows on the small screens of iPods instead of the full Description or Summary.
-
Author: Your name
-
Summary: Copy and paste the information you wrote in the above Description field.
-
Category: When iTunes users “browse” categories in the store, which categories do you want to be listed under? You can ctrl-click to select more than one category
-
Owner: If you decide to “go public” and get listed in the iTunes directory, you must include your name and your email address.
-
Email: Include if you want to be listed in the directory
-
Channel Image URL: Same as Image above
-
Explicit Content: We do not allow explicit content on the 3CRSS server.
- Block Channel: Leave blank.
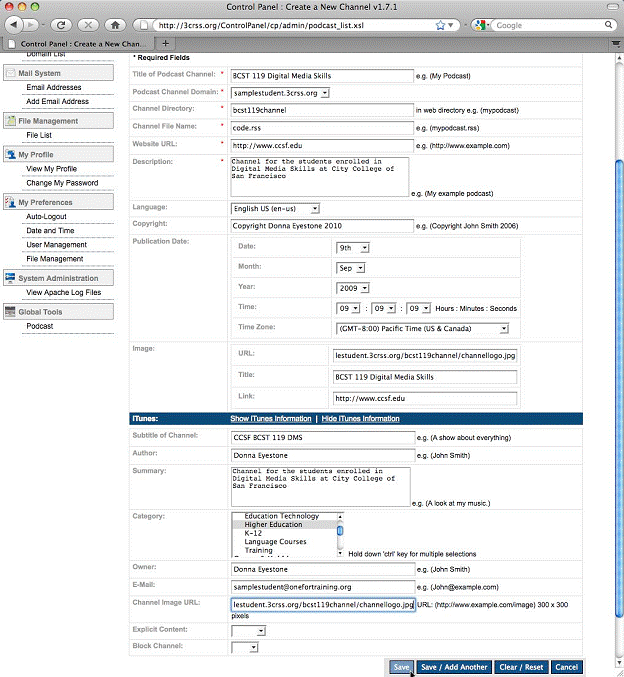
Click Save when you are ready.
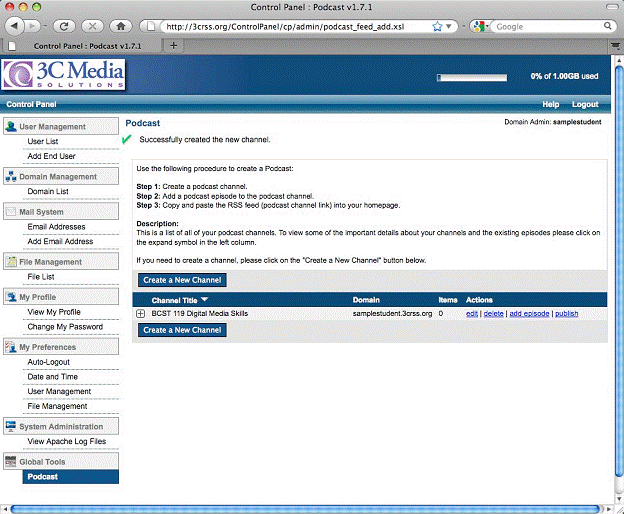
You should see your Podcast appear in the list of Channel Titles. This means you have created the channel which will hold all the episodes you create.
Add an episode to your channel
Once your channel is set up, you'll need to add at least one episode. Click “add episode” to the right of your channel title. In the new window, fill out the form data.
-
Title of Episode: A title for this specific episode.
-
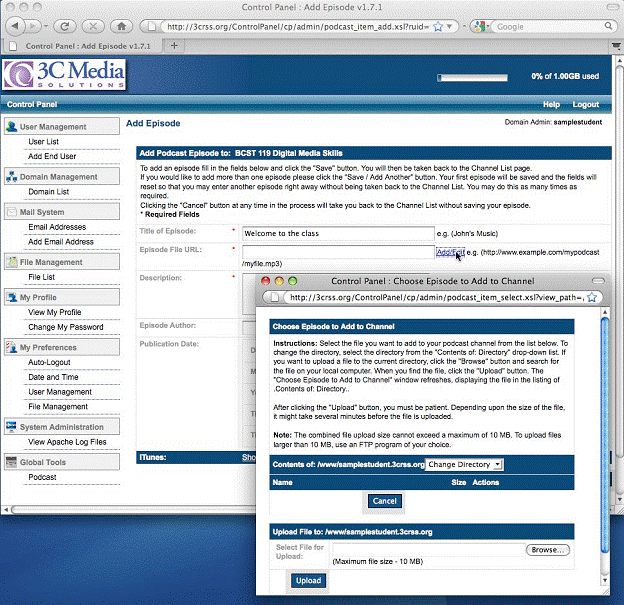
Episode File URL: Click the Add/Edit button (shown above). Here is where you’ll upload your media, (for directions to upload media that is larger than 10MB, click here).
-
Using the Change Directory pop-up menu (shown above), choose the folder name you want to place your media in. Click the select button to choose your media file, and then notice the URL path is completed for you.
-
Description: This is a description of this specific episode. Your channel may be about your course, for example, but this first episode is about some specific topic. Describe your episode so students can find what they need when they see a list of episodes in your channel.
-
Episode Author: Decide who deserves credit here.
- Publication Date: Set these to the current date and time when you upload your media.
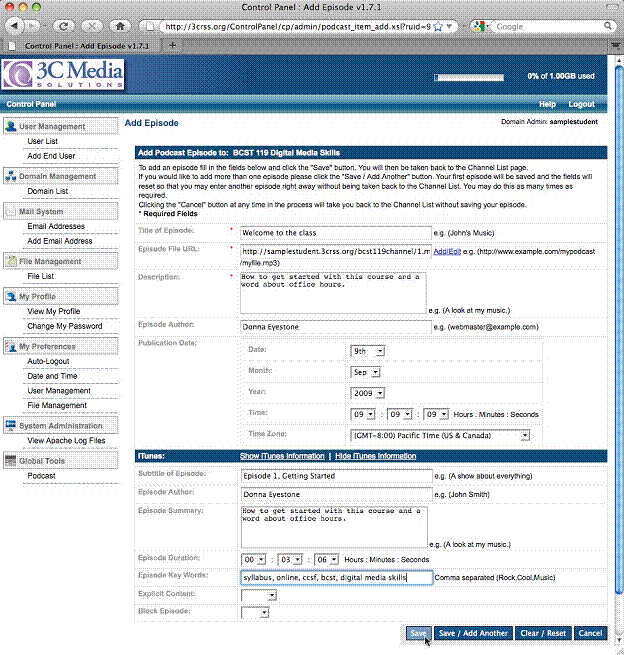
Click Save (or Save/Add Another if you have another)
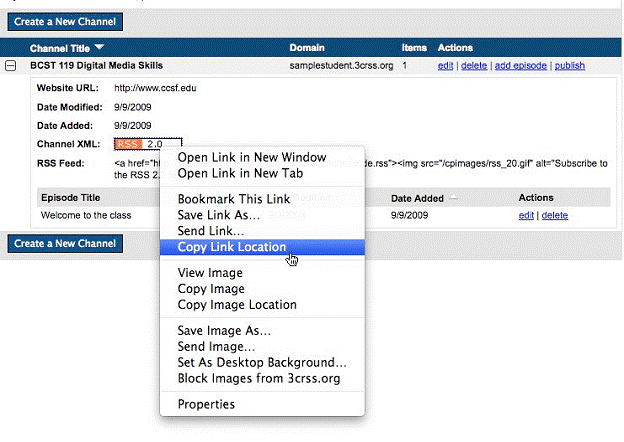
After you've added your episode, the podcast channel is ready to go! Before you leave this page, right-click (ctrl-click) the RSS 2.0 orange tag in the Channel XML and then choose Copy Link (shown below). You'll want this link in your clipboard to subscribe to your channel.
Subscribe to your channel by pasting the URL to your podcast feed in a browser and pushing enter. You'll see your podcast name and episodes appear in a list, with the option to subscribe.
To subscribe in iTunes, go to the Advanced menu, and then choose "Subscribe to Podcast"
In the window that appears, enter the URL to your podcast feed. This is the address to the .XML or .rss document on the server.

